Jun 19, 2020
A closer look at the “View notices” screen
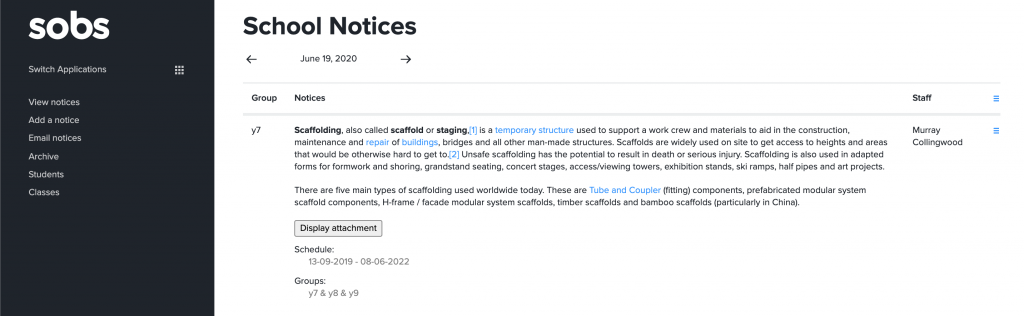
By default when this page loads it will display notices for the current date – as show below the title. You can step through neighbouring dates by clicking the arrows on either side of the date, or click on the date to view a calendar and select a new date to view.
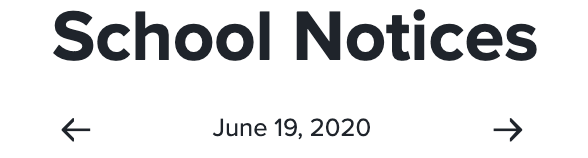
Below the notice content you will find some optional information. If the notice has an attachment (an image or PDF) then a button to display this attachment is included. (Attachments are displayed automatically with the emailed notices and on the Public Displays). If the notice is scheduled for more than just today the scheduled dates will be shown. If the notice is included in multiple groups we will list the groups in this area. If the notice does not have an attachment, is only scheduled for today and for a single group then there is nothing display below the notice content.

The right hand menu includes options as follows:
“Edit notice” to modify the content.
“Add schedule” to schedule additional dates.
“Edit schedule” to edit the current dates.
“Delete schedule” to delete a current date or range.
“Delete attachment” to drop an existing attachment.
“Add attachment” to add an attachment (only one per notice).
“Delete notice” to delete this notice.

The menu at the top right of the table provides options as follows:
“Add notice” to add a notice (the same as the menu entry)
“Search for notices…” provides a full text search facility for locating previous notices.
“Print notices…” allows you to select groups for a printed list of notices.
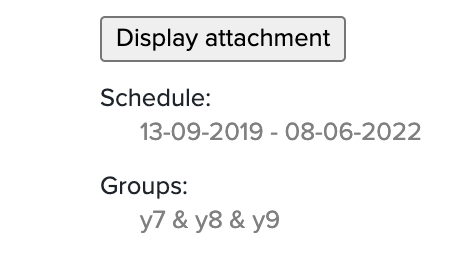
Adding a notice
We will describe the elements of the form for adding a notice. Firstly the actual notice content. There is a plain text editor and a styled editor, your access to the editors may be managed by the SOBS Administrator. Below is a sample image of the styled editor.
If your school utilises the Category option then a category selection will then be displayed.

The next control defines who the notice is being delivered to. You can choose from Groups, Classes, or Students. The Groups (pictured first) allow the user to select groups that the notice will appear in. You can select multiple groups however we suggest keep the list as refined as possible.

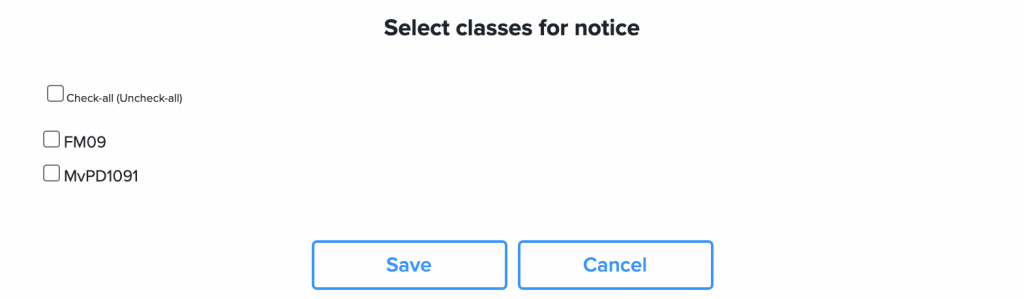
The Classes (pictured next) allow the user to search and select class codes for the notice. The notice will be directed to the staff member and students of the selected classes.

For example I have searched for “09” which I’m hoping will display some class names for some Year 9 classes.
A similar search function exists for selecting students.

By default the notice will automatically be scheduled for the next available date. If you are adding the notice prior to the notice cut-off time then the date will reflect today’s date. If you are adding the notice after the notice cut-off time then the date will reflect the next school day.

You may use the “Repeat the notice schedule through to an end date” to specify a date range for the notice. By default we will schedule the notice to run every school day, although the frequency option allows you to select from a number of different frequencies.

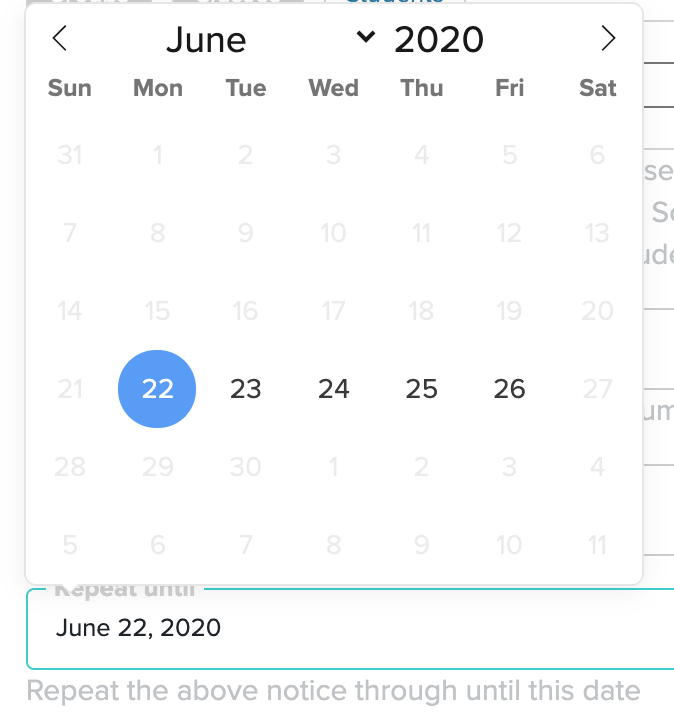
When you select the end date, click on the “Repeat until” field and a calendar will popup. You can select a valid end date from the calendar by clicking on the date displayed. If your school has configured a limit of notice repeats then only the valid dates will be displayed. Similarly, notices can only be scheduled on school days, hence the weekends are not selectable. In the example image my term concludes on the 26th of June and restarts on the 13th of July, I am not able to select any date during the term break.